Chainlink External Adapters, Sanity, ERC20 and stuff like that – Part 3: Smart Contract & Chainlink Oracle/Operator


And finally, we have arrived to this last part of the series where all things that we have done so far would converge. To recap, in this article series, we:
- Created a Sanity User Schema and hosted it using Sanity Studio and Content Lake.
- Wrote an External Adaptor, ran it and created a bridge to connect it with Chainlink Node.
- Finally, we created a Job out of it on our locally running Chainlink Node. Now, we shall call the same job from our smart contract. Please note that to follow through this part, you need your external adapter running and a job created from it on an already running Chainlink Node.
How the contract will function?
What we are going to code here is an ERC20 contract on Chainlink steroids. Basically, the contract will build upon Openzeppelin’s ERC20 contract and have a hook which would check for certain conditions before facilitating token transfer from sender to receiver.
It is that hook that will require the workflow we have created until this point. If you are unfamiliar with hooks – they are just functions which run before a certain function is ran. They are used for putting in checks or for facilitating some extra functionality before the main function’s execution.
Hooks
You might think at this point, what is the difference between a hook and a modifier in solidity? The main difference would be modifiers in function prototypes are used to perform checks. Hooks can not only perform checks but also execute some business logic. Moreover, modifiers can be used with almost any function but hooks are aimed at single function (which most often is token transfers).
Before we start the Code
In the previous article we talked about deploying an Oracle contract for the tutorial. However, it turns out we need an upgrade (kind of how Tony upgraded from Mark 1 all the way to the Nanotech suit). The thing is Oracle contract provided by Chainlink cannot handle the multi-variable output data we require. We need an Operator (not the gun in Valorant). Operator contract will help us with the last part of the Job which is to submit the transaction and get the values to the contract.
There is an operator.sol provided in the GitHub repo of this tutorial if you want to deploy yours (which you would). Deploy the operator contract by passing in the address of the LINK token on your chain and the wallet address which you would use to deploy the contract. The wallet address will then become the owner of the contract. After this you need to run the setAuthorizedSenders() function by passing in your Chainlink Node address in an array. This is the Operator’s counterpart of setFulfillmentPermission.
Secondly, we need to pay attention to the Job spec for this change. The oracle contract address parts will change to the Operator Address. And since we are going to encode the wallet address as bytes array, that will need to change to in the encode_data task. The Job Spec should look something like below:
type = "directrequest"
schemaVersion = 1
name = "(Get > x2 Bool)"
externalJobID = "efde17c8-f174-4470-b084-34d147b5af7e"
maxTaskDuration = "0s"
contractAddress = "0x51CE786075cBe0Dc21869Cc4273Cb98720436aA7"
minIncomingConfirmations = 0
observationSource = """
    decode_log   [type="ethabidecodelog"
                  abi="OracleRequest(bytes32 indexed specId, address requester, bytes32 requestId, uint256 payment, address callbackAddr, bytes4 callbackFunctionId, uint256 cancelExpiration, uint256 dataVersion, bytes data)"
                  data="$(jobRun.logData)"
                  topics="$(jobRun.logTopics)"]
    decode_cbor     [type="cborparse" data="$(decode_log.data)"]
    fetch           [type="bridge" name="sanity-bridge" requestData="{\\"id\\": $(jobSpec.externalJobID), \\"data\\": { \\"wallet\\": $(decode_cbor.wallet)}}"]
    parseVerified     [type="jsonparse" path="data,isVerified" data="$(fetch)"]
    parseQualified     [type="jsonparse" path="data,qualified" data="$(fetch)"]
    parseWallet     [type="jsonparse" path="data,walletAddress" data="$(fetch)"]
    encode_data     [type="ethabiencode" abi="(bytes32 requestId, bytes walletAddress, bool isVerified, bool qualified)" data="{ \\"requestId\\": $(decode_log.requestId), \\"isVerified\\": $(parseVerified), \\"qualified\\": $(parseQualified), \\"walletAddress\\": $(parseWallet)}"]
    encode_tx       [type="ethabiencode"
                      abi="fulfillOracleRequest2(bytes32 requestId, uint256 payment, address callbackAddress, bytes4 callbackFunctionId, uint256 expiration, bytes calldata data)"
                      data="{\\"requestId\\": $(decode_log.requestId), \\"payment\\": $(decode_log.payment), \\"callbackAddress\\": $(decode_log.callbackAddr), \\"callbackFunctionId\\": $(decode_log.callbackFunctionId), \\"expiration\\": $(decode_log.cancelExpiration), \\"data\\": $(encode_data)}"
                    ]
    submit_tx    [type="ethtx" to="0x51CE786075cBe0Dc21869Cc4273Cb98720436aA7" data="$(encode_tx)"]
    decode_log -> decode_cbor -> fetch -> parseVerified -> parseQualified -> parseWallet -> encode_data -> encode_tx -> submit_tx
"""
Notice how we invoke the fulfillOracleRequest2() on the smart contract.
You may wonder why use bytes and why not address type. The reason is simple – at the time of writing it is not supported. Also, it’s not that difficult to convert from one to the other.
You can find the list of supported datatypes at the below Chainlink Documentation. {% embed docs.chain.link/docs/large-responses/#respo.. %}
If you followed the series, you should now have the following:
- External Adapter Running on your Localhost.
- A deployed Operator Contract.
- Local Chainlink Node funded with Ether and LINK and having a Job referencing the external adapter and Operator Contract Address.
- Allowance set on the Operator Contract for the Chainlink Node. Now let’s get to the code.
The Code
// SPDX-License-Identifier: MIT
pragma solidity ^0.8.4;

import "@chainlink/contracts/src/v0.8/ChainlinkClient.sol";
import "@openzeppelin/contracts/token/ERC20/ERC20.sol";
import "@openzeppelin/contracts/token/ERC20/extensions/ERC20Burnable.sol";
import "@openzeppelin/contracts/access/AccessControl.sol";
import "@openzeppelin/contracts/utils/Strings.sol";

contract OurSanityToken is ERC20, ERC20Burnable, AccessControl, ChainlinkClient {
    using Chainlink for Chainlink.Request;
    using Strings for uint160;
    bytes32 public constant WHITELISTED_ROLE = keccak256("WHITELISTED");
    struct UserStatus{
        bool isVerified;
        bool qualified;
    }
    mapping(address => UserStatus) public users;

    address private _oracle;
    bytes32 private _jobId;
    uint256 private _fee;

    event ReqFulfilled(
        address indexed _walletAddress,
        bool indexed _isVerified,
        bool indexed _qualified
    );

    constructor() ERC20("OurSanityToken", "OST") {
        _grantRole(DEFAULT_ADMIN_ROLE, msg.sender);
        _grantRole(WHITELISTED_ROLE, msg.sender);

        setPublicChainlinkToken();
        _oracle = 0x51CE786075cBe0Dc21869Cc4273Cb98720436aA7;
        _jobId = "efde17c8f1744470b08434d147b5af7e";
        _fee = 0 * LINK_DIVISIBILITY; // (Varies by network and job)
    }

...

}
In the part following up to the contract’s constructor as shown above, we write some boilerplate and then declare the following:
WHITELISTED_ROLEfor users who interact with the contract. This sets up a nice hybrid access control where the user can either follow the rules on the Web2 side of things or be Whitelisted from the smart contract and will be able to facilitate token transfers.- A
UserStatusstruct and ausersmapping which would be used to record the status of the user by querying the Sanity DB via the Operator Contract allowing access to the Chainlink Node’s Job referencing the external adapter and then back exclusively in that order. - Private variables of
_oracle,_jobIdand_feeto keep track of the operator address, job we need to run and the fees we need to pay respectively. ReqFulfilledevent which will be emitted once the fulfillment function on our smart contract successfully executes.
Throwback to solidity basics where an event can have max of 3 indexed fields. These can be used when searching using the events and pinpointing the user’s details on the log data on the frontend.
The constructor code initializes the deploying wallet address as the admin and whitelists that address along with setting the default address for LINK token on the chain deployed. It also initializes the Operator address (in the _oracle constant), the Job ID and Fee required (which will be 0 since we specified that in the Job spec).
Next…
contract OurSanityToken is ERC20, ERC20Burnable, AccessControl, ChainlinkClient {

...

    function mint(address to, uint256 amount)
    public
    onlyRole(DEFAULT_ADMIN_ROLE) {
        _mint(to, amount);
    }

    function whitelistUser(address user)
    public
    onlyRole(DEFAULT_ADMIN_ROLE) {
        _grantRole(WHITELISTED_ROLE, user);
    }


...

}
We then define the mint() function and the function to whitelist any address (the whitelistUser() function). These can be invoked only by the deployer (admin). While the minting part might seem okay but the apparent flaw in this logic is that the admin assumes control of the Whitelisting process. This can be a single point of failure/vulnerability. One way to remove this can be via Multi-Sig (food for thought).
contract OurSanityToken is ERC20, ERC20Burnable, AccessControl, ChainlinkClient {

...

    function getUserVerificationStatus()
    public
    view
    returns (bool, bool) {
        return (
            users[msg.sender].isVerified,
            users[msg.sender].qualified
        );
    }


...

}
The getUserVerificationStatus() function can be invoked for getting the status based on the rules we discussed previously. This would return the status of the invoker so that no one can just spam it and get another address’ status. These would return two false values by default. The methods below can be invoked by the user to get the actual status.
contract OurSanityToken is ERC20, ERC20Burnable, AccessControl, ChainlinkClient {

...

    function userVerficationQuery()
    public
    returns (bytes32 requestId) {
        Chainlink.Request memory request = buildChainlinkRequest(_jobId, address(this), this.fulfill.selector);
        request.add("wallet", Strings.toHexString(uint160(msg.sender), 20));
        requestId = sendChainlinkRequestTo(_oracle, request, _fee);
    }

    function fulfill(bytes32 _requestId, bytes memory _walletAddress, bool _isVerified, bool _qualified)
    public
    recordChainlinkFulfillment(_requestId) {
        address addr = bytesToAddress(_walletAddress);
        users[addr].isVerified = _isVerified;
        users[addr].qualified = _qualified;

        emit ReqFulfilled(addr, _isVerified, _qualified);
    }

...

}
The userVerificationQuery() and the fulfill() functions form the cream of the contract. The first one is used to send the query to the Chainlink Node via the operator contract while the latter is invoked once the job on the Chainlink Node has concluded and a transaction has been submitted to the operator contract.
In userVerificationQuery() we first initialize the request we want to send to the Chainlink Node via operator contract with the help of buildChainlinkRequest(). The request object is initialized with the job ID for the job that should be run, the address of the contract and the selector of the function to run after Job execution.
We then add the wallet parameter that the external adapter expects to be passed in the function body. We pass the invoker’s address by typecasting the address to string. That’s a better way to convert an address in solidity to a string type.
Finally we return the request id of the Chainlink request by specifying the operator contract address, the request we have formed and the fees inside sendChainlinkRequestTo().
It might seem strange to you at this point if you are a beginner. We are not using a return statement inside userVerificationQuery(). Pay attention to the function prototype. There we specify that the function returns a bytes32 variable of name requestId. So when we use that variable inside the method, we do not need to use the return statement anymore as Solidity knows that will be returned.
The fulfill() function receives the wallet address (_walletAddress) and two bools (_isVerified & _qualified) which indicate if user is verified via Web 2 workflow and if he/she has been a member long enough respectively. This wallet address is same as that of the invoker of the userVerificationQuery(). We edit the status of the same and then emit the ReqFulfilled event.
contract OurSanityToken is ERC20, ERC20Burnable, AccessControl, ChainlinkClient {

...

function _beforeTokenTransfer(address from, address to, uint256 amount) internal virtual override {
        super._beforeTokenTransfer(from, to, amount);
        require(hasRole(WHITELISTED_ROLE, msg.sender) || (users[msg.sender].isVerified && users[msg.sender].qualified), "User not permitted");
    }

    function bytesToAddress(bytes memory _addr) private pure returns(address addr) {
        assembly {
        addr := mload(add(_addr, 20))
    }

...

}
_beforeTokenTransfer() function is actually a hook that will be invoked every time before a token transfer is invoked. Notice how we pass the parameters up the inheritance tree by using super._beforeTokenTransfer(). This ensures that if our smart contract is inheriting from another smart contract which is inheriting from another, all the _beforeTokenTransfers() will be invoked.
Lastly, we check if the invoker is whitelisted. If not, then the invoker needs to have verified using the verification pipeline and should have been a member long enough before transferring his/her/its (robots, again) tokens.
bytesToAddress() is a utility function we define here to convert the wallet address we received via operator to proper address type. The function uses assembly to pick the address from the complete bytes type data. This, again, is a better practice of converting bytes type to address type in solidity.
Running the Code
You may deploy the code using Remix or Hardhat or anything that works. Make sure to switch the provider to Injected Web3 in Remix if you are using it. You do not need to fund the smart contract with LINK tokens in this case since the Job we are going to execute does not take any.
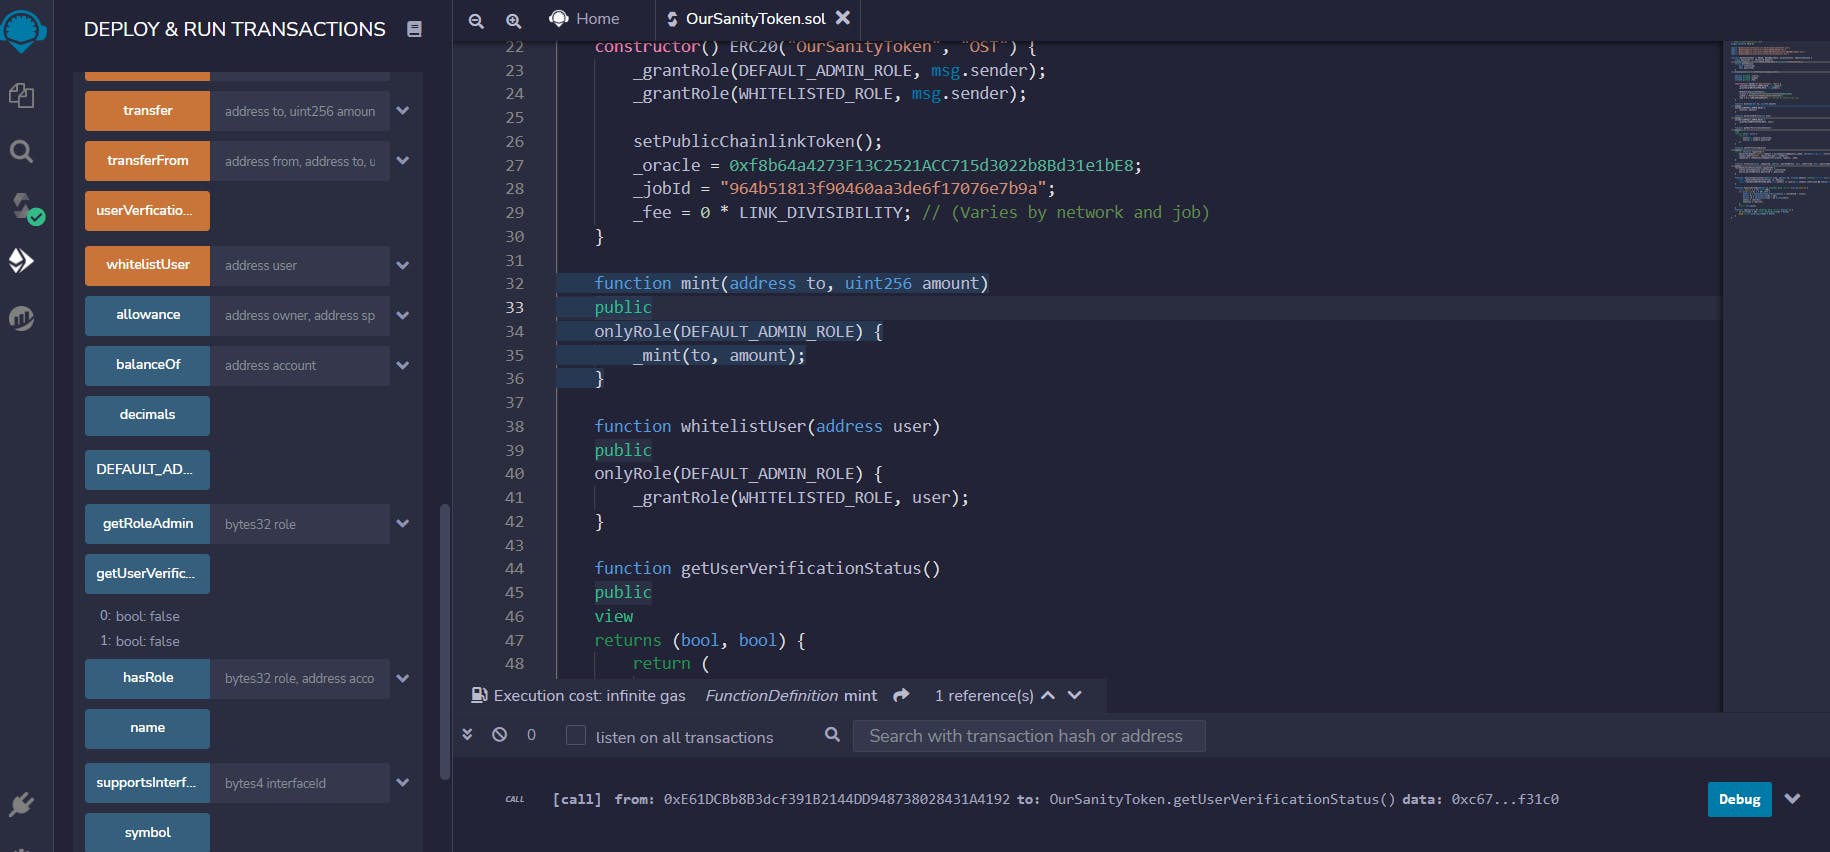
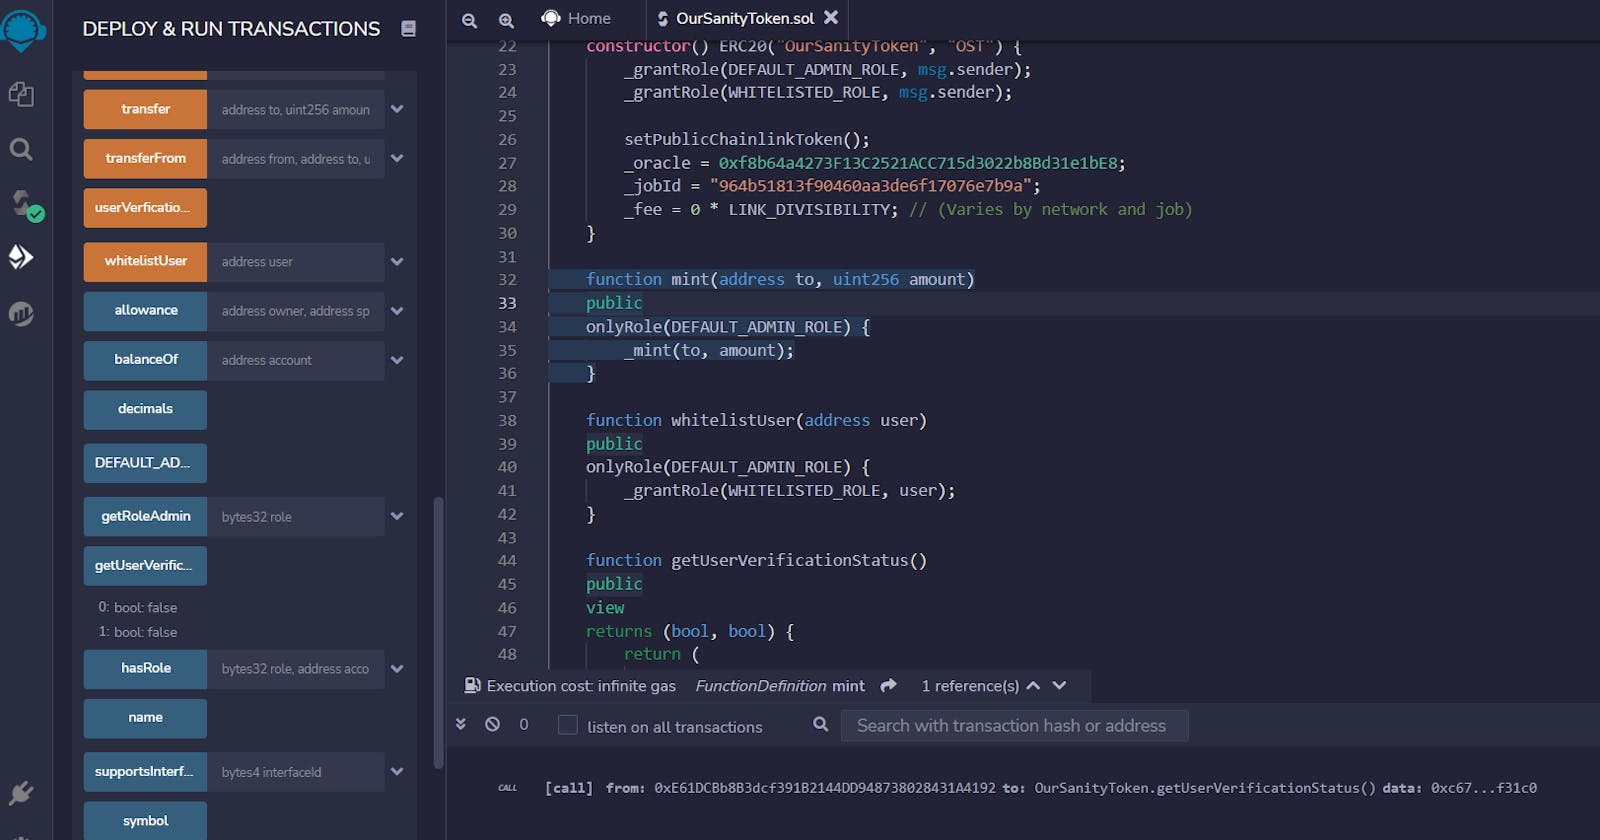
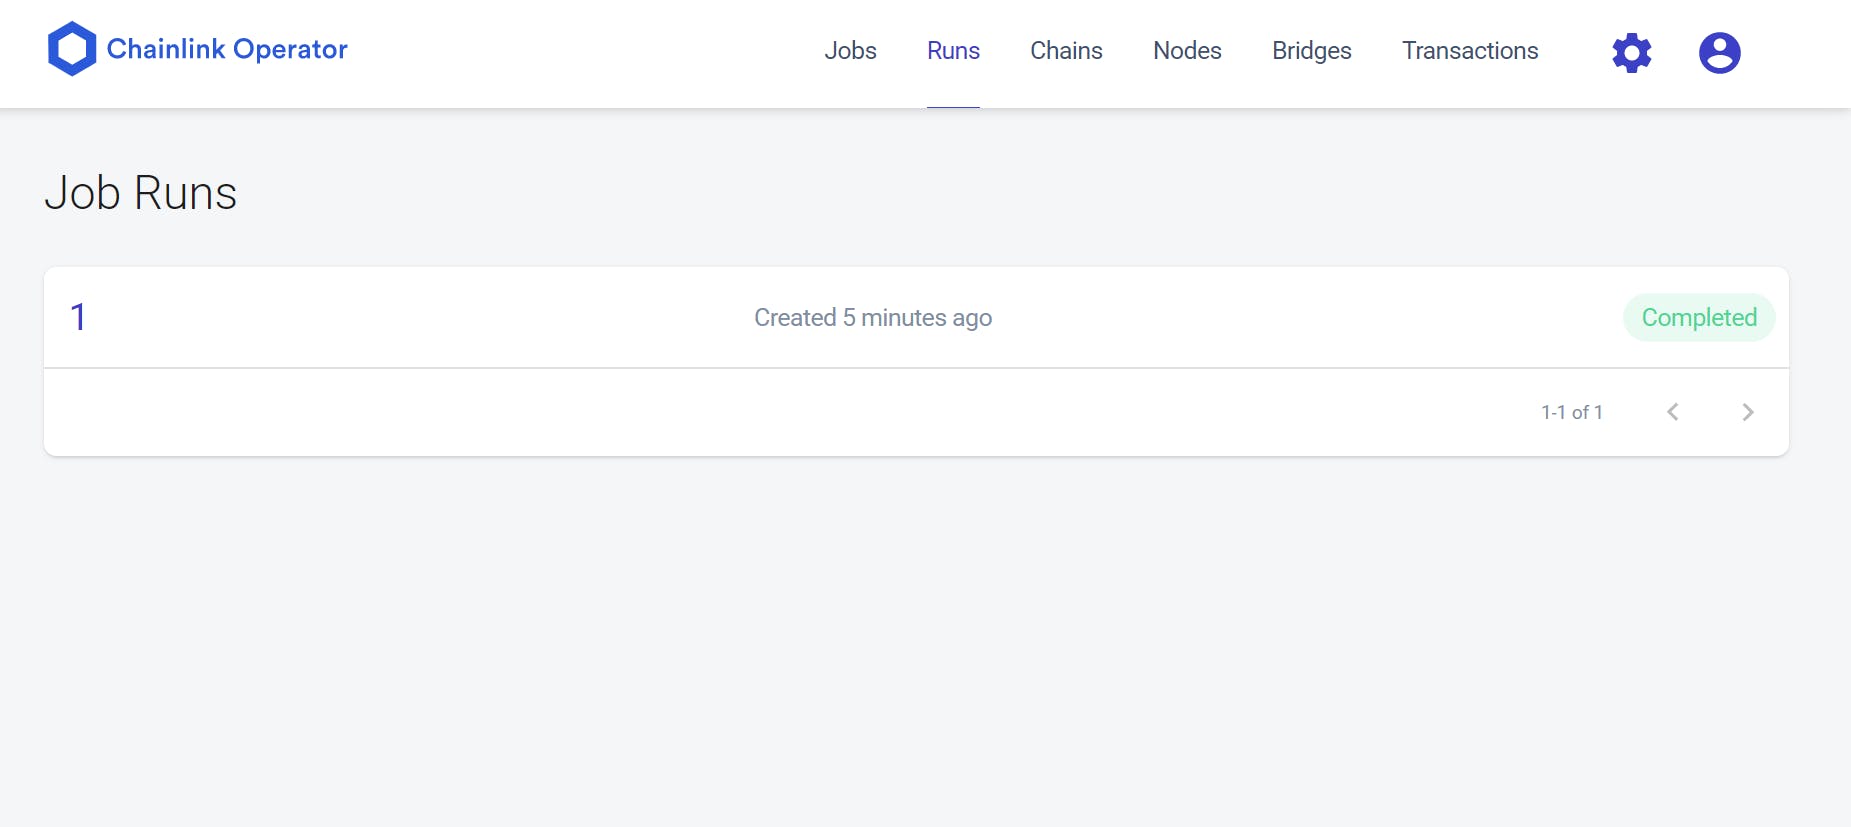
Invoke the getUserVerificationStatus() to get the default values of false. Invoke the userVerificationQuery() method. This should prompt a Metamask transaction. Once that transaction is confirmed, switch to the Chainlink Local Node’s console and browse to Runs. You should see the run listed there. The Job should be instantaneous and you should see “Suspended” as its status as shown below.
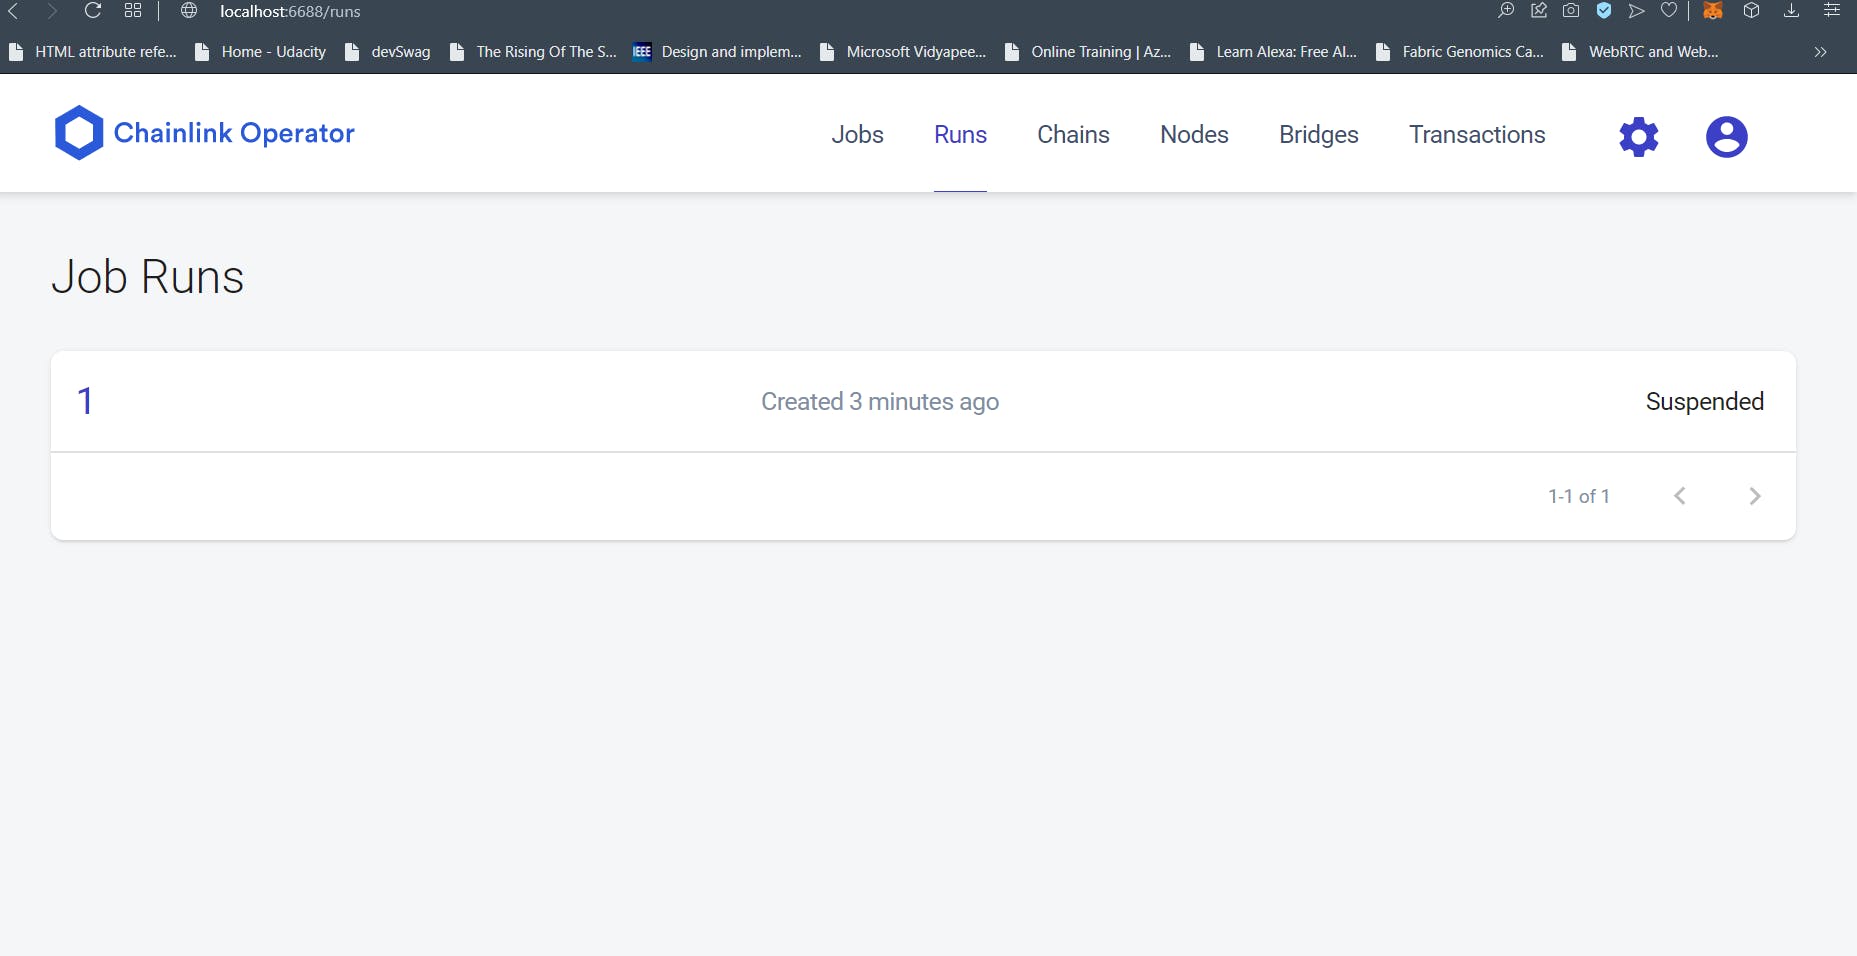
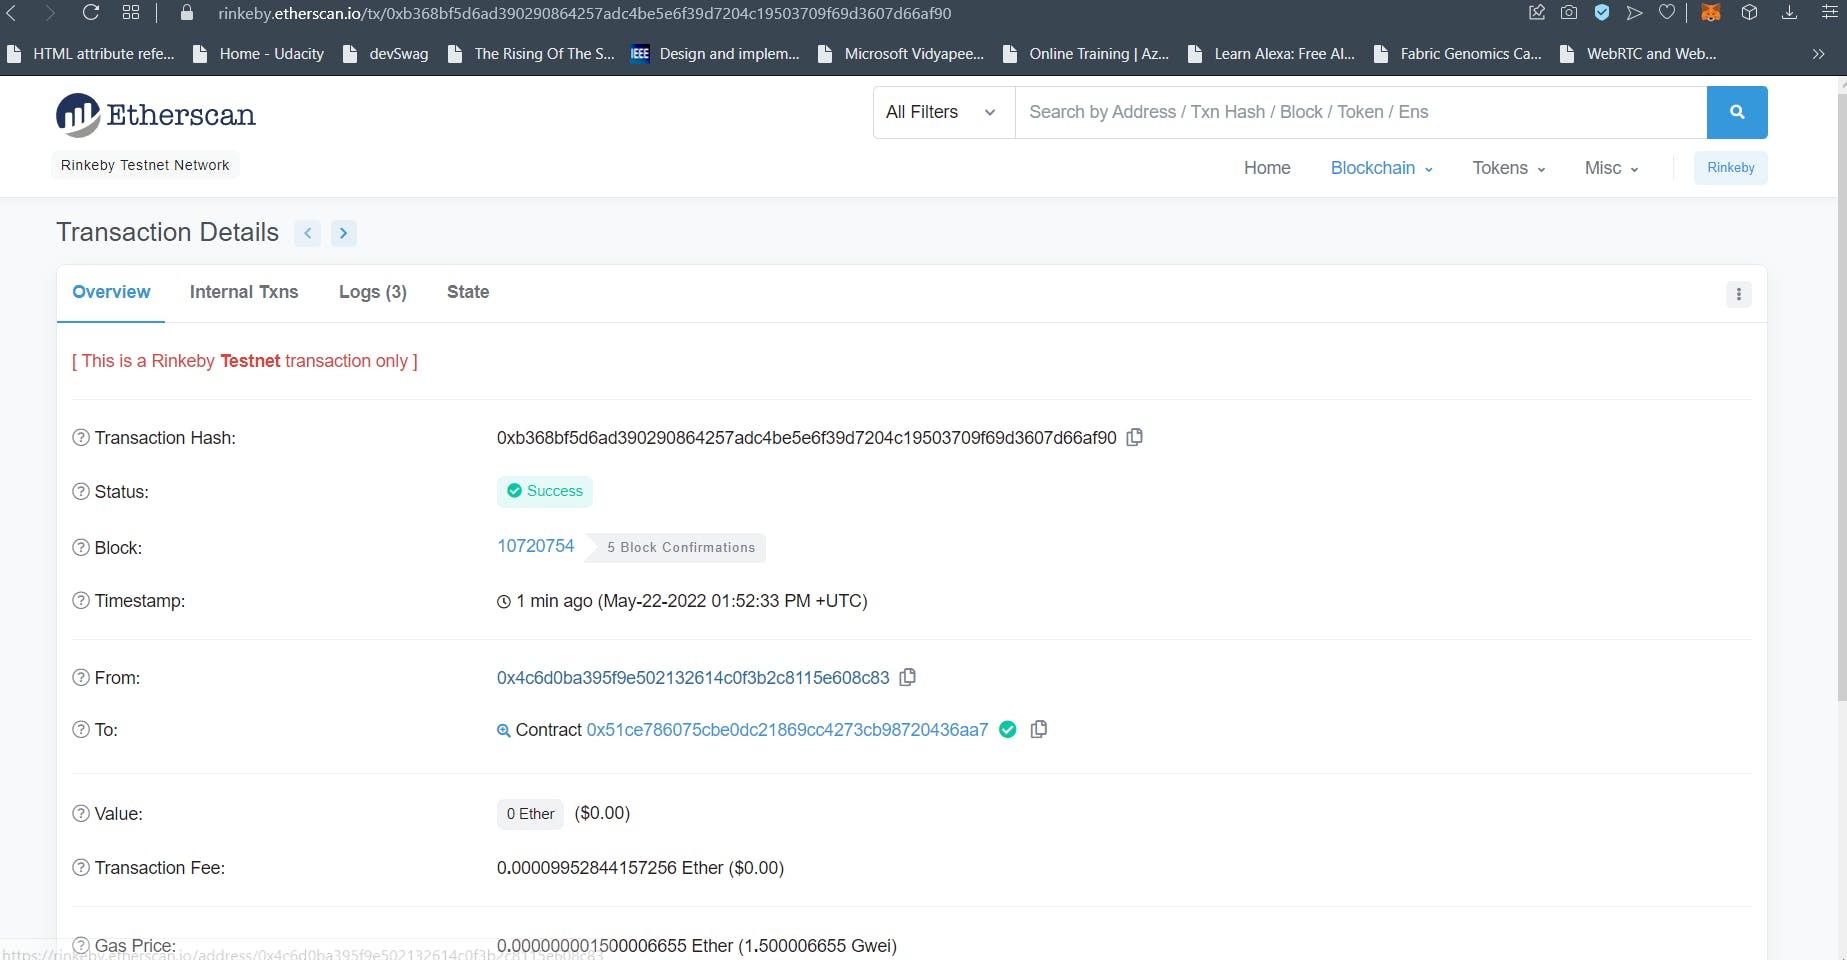
Do not worry. This means that the Job has executed successfully and a transaction has been submitted to the Operator Contract. If you have followed all the steps, the switching over to the Operator Contract on Etherscan should show you the successful transaction as below.
After the confirmation of success, the Job’s status will change from “Suspended” to “Completed” like shown below.
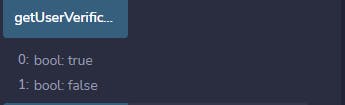
You may now invoke the getUserVerificationStatus() function and you will see the status being reflected in the bool like the one shown below.
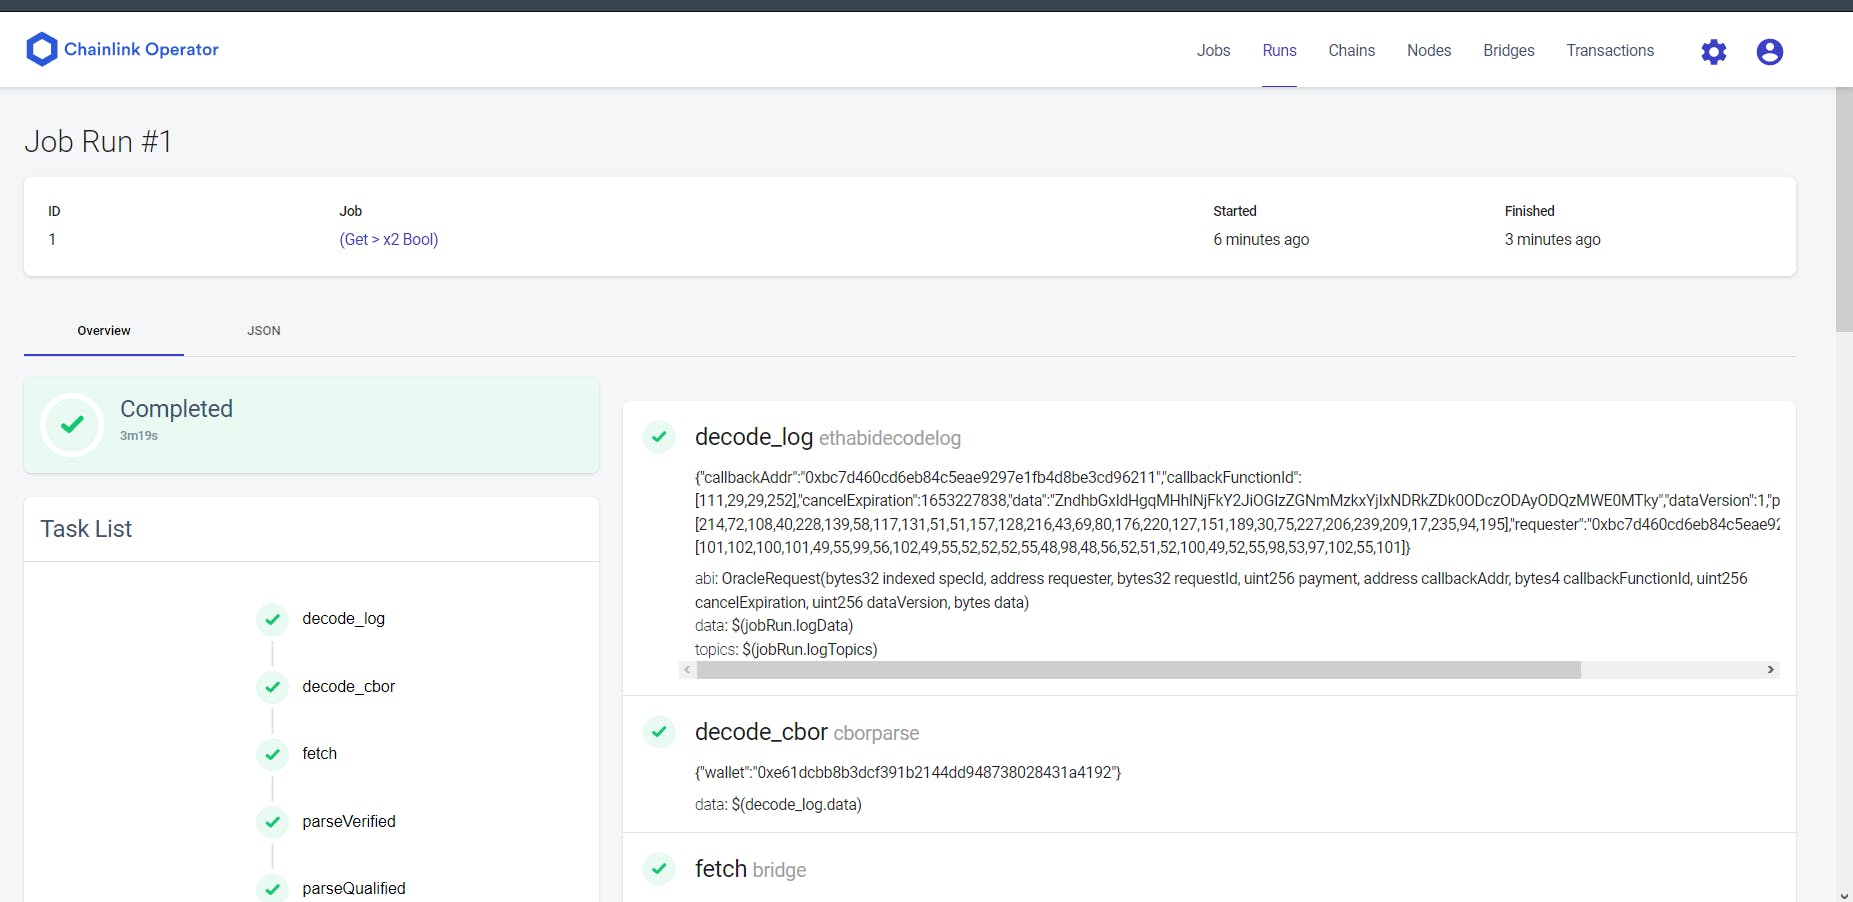
If you click the Run over in the Chainlink Console under Runs tab, it should open up the complete log of the Job’s run (image below). Skim through it all. You will notice at the very last of it, in the details of the submit_tx task, transaction details would be shown. This is the same transaction which was submitted to the Operator Contract.
Let’s end this one, shall we?
This concludes our article and in-effect the series. It might have been a lot. But that’s how things work – you want something cool you have to work for it.
Once you get this kind of a workflow running, your next steps can be to complete the Web 2 part which includes the interface and the whole Verification Pipeline. You might even setup something monstrous like an AI/ML verification pipeline leveraging AWS Rekognition. Possibilities are plenty.
The code for this tutorial series has been open-sourced at this repo.
If you want me to write on a specific topic, feel free to approach me on Twitter or through my mail for suggestions. If you have loved this article or this series, show some love and click those buttons? Helps me to stay motivated 😊
Until next time!