

Azure and BAAS.
Firstly, BAAS — What is it?
You can skip these parts and go directly to “Steps to Set-up Fabric Environment on Azure” if you are already familiar with these topics and just want a quick tutorial.
So what is BAAS? Any guesses? You might have heard about PAAS which stands for Platform as a Service, SAAS which stands for Software as a Service and IAAS or Infrastructure as a Service. But what is BAAS? At this point, if you might be from a Web Development background, you might be thinking, “Is it Backend as a Service?”
You couldn’t be further from the answer if that’s what you are thinking. BAAS stands for Blockchain as a Service. The term might be new to you or might not. The thing is, BAAS has existed for quite a few years now. It started out when Projects like Hyperledger and Corda came into the limelight.
Cloud Providers & BAAS.
One of the basic things you need to know about BAAS is that just like PAAS and IAAS, BAAS is also a managed service. Basically in BAAS, you do not need to configure the Blockchain to the extent you would have to when setting it up manually. You also do not need to have the infrastructure.
This is where Cloud Providers come in. When the hype for BAAS started, major cloud providers like AWS and Oracle sensed the potential in it all. Naturally, they made the decision of investing in this new technology which could prove to be one of the most important ones in revolutionizing many industries. After all, blockchain is not all about cryptocurrency. That is a common misconception. Equating blockchain and cryptocurrency would be like saying that DeepFake and Deep Learning are same. No, cryptocurrency is a use case of blockchain in the same way as DeepFake is to Deep Learning.
Coming back to the topic at hand, Cloud Providers invested in blockchain and that popularized BAAS. Today, you can find BAAS offerings by almost all popular cloud platforms. From AWS to Oracle, from Google Cloud Platform to Azure.
Azure & BAAS.
Microsoft Azure
Coming to Azure, why would I choose Azure for blockchain? Some might say at this point that AWS has more market share and is more popular, it might be the ideal solution. I would like to disagree. While I would give AWS their fair share of credit, I believe that Azure is a better solution. Here’s why:
- Security Development Lifecycle — Microsoft makes sure that everything you development on Azure Cloud Platform remains safe by their security norms which are termed as top-of-the-line.
- .Net — While I am not a .Net developer myself, I have acquaintances who are in fact quite satisfied with the .Net capabilities offered by Azure. This gives Azure an upper-hand over AWS.
- …
The list could go on and on. But these are not specifically why I chose Azure. You can find such reasons for plenty if you search for articles which compare such capabilities of Cloud Providers. The reason I chose Azure Platform over AWS, GCP and other providers is because:
- Microsoft invested in Blockchain and helped innovate BAAS with even more fervour than AWS or GCP. Microsoft even went on to develop Coco Blockchain Platform for Private Blockchain Solutions. Microsoft Azure made JPMorgan’s Quorum Blockchain as its preferred brand of Blockchains but at the same time provided customer with options like Ethereum — one of the most famous and oldest blockchain platforms for DApp development and Hyperledger Fabric — the go to blockchain platform, which according to Hyperledger is used by almost half of top 100 companies listed by Forbes. This is unlike AWS where there is support for just Ethereum and Fabric. At the time of writing this article, GCP had support for just Hyperledger Fabric via their Cloud Launcher.
Hyperledger Fabric on Azure.
Hyperledger Fabric and Azure.
How would you develop Hyperledger Fabric Solutions on Azure? At this point, I am assuming that you have the basic knowledge about Fabric and its components and know your way around Azure. When you launch your Fabric solutions on Azure, most of the time, you would be using an Azure VM instance (or multiple, if you are running production environment). This is where you can follow two paths — the easy way or the hard way.
You can use the Hyperledger Fabric template available in the Azure Marketplace to launch your environment on Azure or you can take the hard way and manually commission VM Instances.
Using Hyperledger Fabric Marketplace Template vs Manually Setting Up Environment.
Using the template is obviously a faster solution. It is also the better solution. If you were to manually set up your environment, you would have to consider 2 cases — using multiple VM instances (usually in a production environment) or a single VM (for a development environment).
If we were talking in Cloud agnostic terms, in the second case, you would have to setup the communication rules between VM instances if you are using multiple ones. You would have to download and install the Fabric SDKs and configure the channels and peers and every other facet of a typical Hyperledger Fabric network. While that is easy to do for single, Dev mode VM instance, things get really complicated when you have to consider multiple running instances.
Hence, it is better to use the Hyperledger Fabric Template to set up your Fabric environment on Azure. And that is what I will help you to do in the following steps.
Steps to set-up a Fabric Environment on Azure.
Once you select the Hyperledger Fabric Template on Azure, you would be directed to a screen similar to the one below:
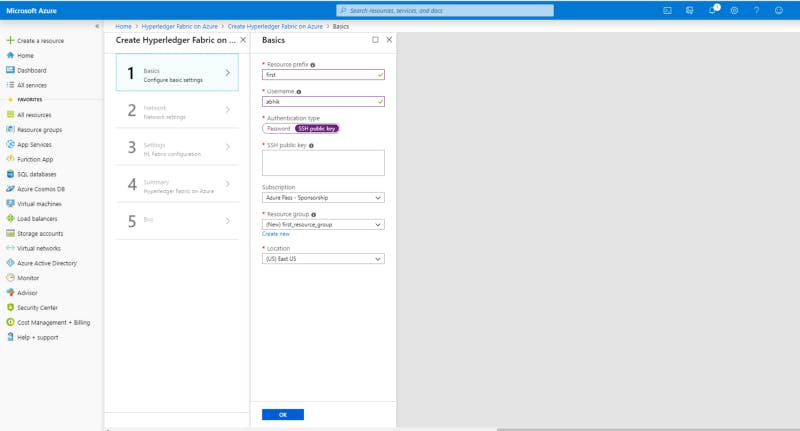
Setting Up Username and Password.
This is essentially step 1. The resource prefix would be used to identify the instances you launch. You need to provide an username and the type of authentication that you would use. I prefer SSH over password, but can make your own choice here. Every Instance must belong to an Instance Group. Select the Location you want your instance(s) to live and of course, your subscription. I am on a Windows PC. So I am using Putty to generate my Public and Private SSH keys.
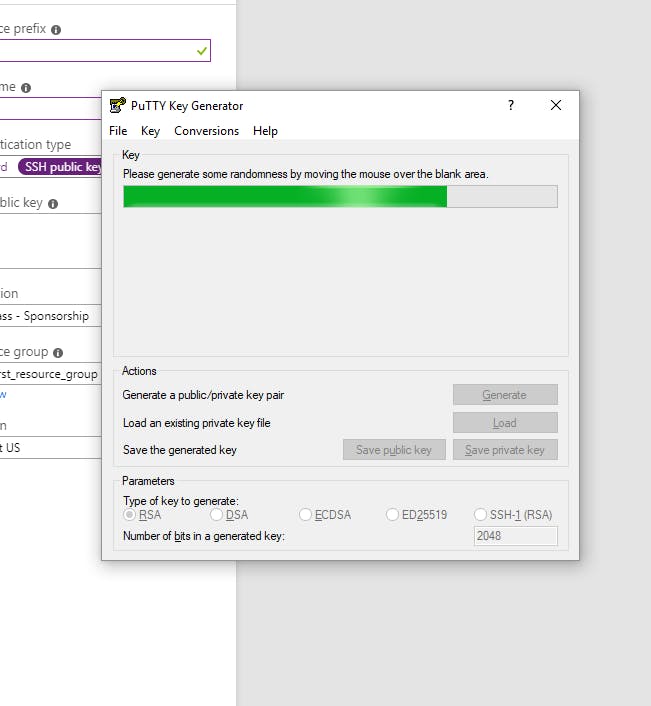
Using Putty on Windows PC for SSH Authentication to Azure instances.
After you have generated your keys, paste the required key in the field and click on “OK”.
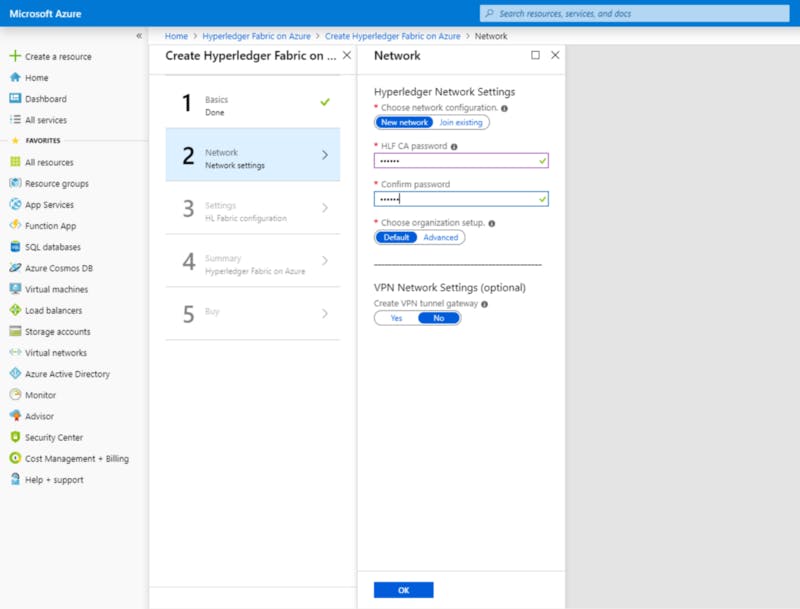
You would be directed to select the password for the Certificate Authority(CA) of the Hyperledger Fabric Network. Recall that CA of the HLF network is responsible for issuing every participant of the network with a X.509 certification. This is used to identify that specific participant in the network.
You can leave the Organization setup to the default settings for the time being. As you can notice, you can also choose to have a VPN tunnel. Click on “OK” to setup your Network configurations.
I had mentioned that you can choose a single VM instance for running your HLF network or even have a multi-node network. The former is good for dev mode while you can use the latter if you plan to deploy your HLF solution to production. For this, I am selecting single VM and clicking “OK”.
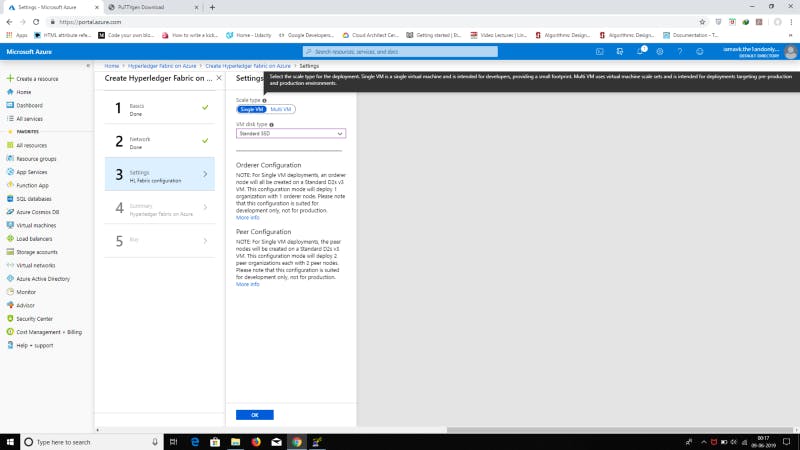
Single Node for this Tutorial.
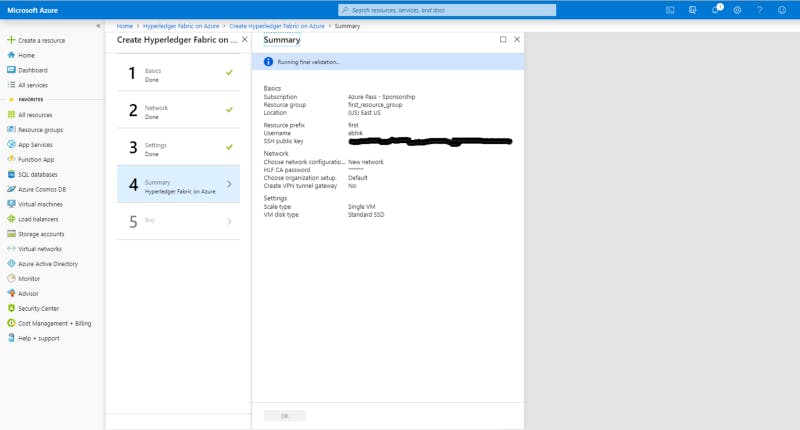
Next, you will be directed to a summary of your choices. At this point, your network configuration is pretty much set-up from a infrastructure point-of-view. This page helps you review those choices. Once you have done that, you can go the next and final step.
At this page, you will be shown the agreement and warnings, you may take your time to read through them. I recommend that you do. This option is labelled as “Buy” because you are essentially buying the solution from Azure at this point. Do review your prices and budget at this point and then feel free to click on “Create”.
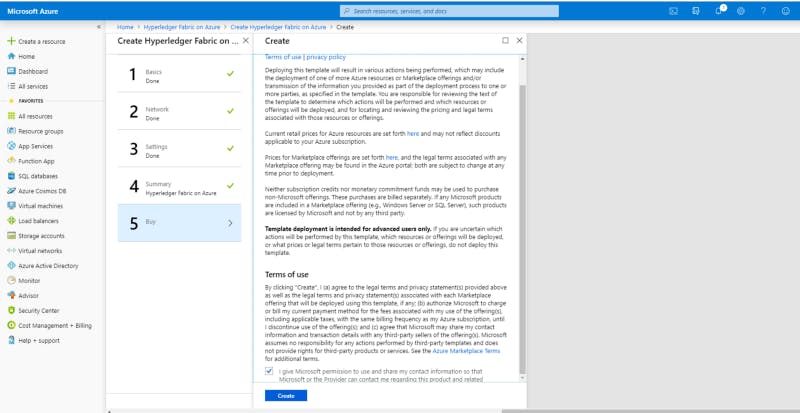
Click on “Create” to start the process.
Your set-up is complete. It would take some time before your VM instance(s) are ready for use. You can view the status from the notifications on the top right corner of your console. Azure will take care of creating the necessary rules and setting up the VM(s).
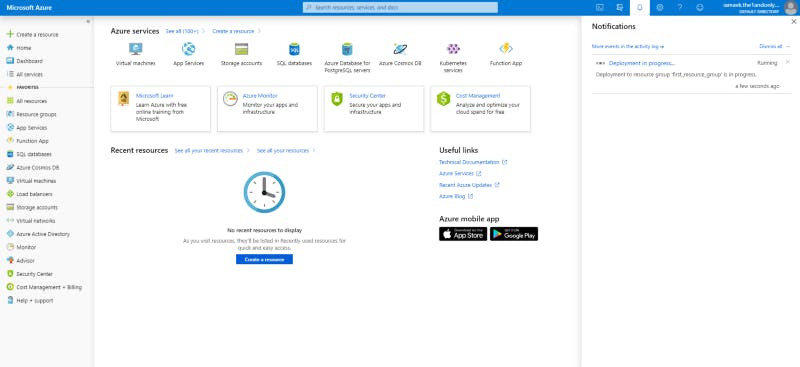
Azure Dashboard and Console. Notifications in the left panel.
Once this is done, you would see the VM instance(s) listed in your dashboard. If you have followed the same steps that I have, you need to use your SSH keys to connect to the instance(s). You do not need to install any SDK or run that scripts you would find on Hyperledger Documentation pages because all that has already been care for you.
You can even download a template zip which would contain the configurations you used to deploy your HLF network. You can either store this for future reference or backup or even use it to spin up similar networks.
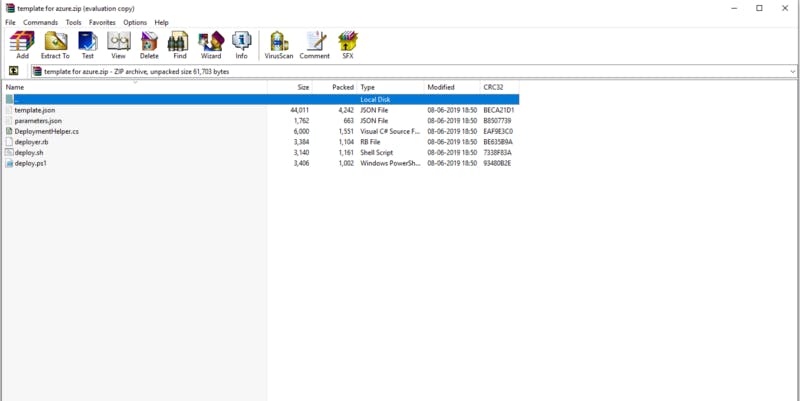
Zip Template containing network artifacts.
Conclusion.
And there you have it! Your HLF network on Azure. The template is pretty handy, isn’t it? I hope this helped you in the way you intended. Before saying goodbye, I would like to mention that the subscription I used to do all this came from the $80 Azure Sponsorship I received when I attended the Global Azure Bootcamp held in Kolkata and I am grateful to the organizers of the event for providing the participants with such resources to help them get started.
So that’s it. Develop your solutions in the HLF network you just created courtesy of the Hyperledger Fabric BAAS model provided Azure.