NextJS 13 – Using Next Auth the Web3 way.

Writes beginner oriented tech articles and things like that :)
In the previous article, we built a barebones NextJS 13 App which used WalletConnectV2, Wagmi, and Viem to tape together a Login of “sorts” in Next. That was very basic, now we take it up a notch. In real-world NextJS 13 apps, you won’t have that kind of structure. You will always be encouraged to use another library called Next Auth (next-auth). Next Auth is currently rebranding to Auth.js but the fundamentals remain the same and the latest version of Next auth is what we will use in this article.
This article will answer the following questions:
How to use Next Auth or Auth JS in Next 13?
How to Integrate Web3 (WalletConnect and Wagmi) with Next Auth?
How to Sign Messages using SIWE and use that with Next Auth in Next 13?
How do the API routes work in the context of Web3 and Next 13?
We will touch briefly on topics relating to “Sign-in with Ethereum”, API Routes in Next 13, and how JWT works in Next 13 with Next Auth. That’s a lot of topics to cover in a mere 2000-word article so let’s get started!
Housekeeping – Route and Component Structure in Next 13
%[https://github.com/abhik-99/NextJS-Blog]
We will be using the same GitHub Repo as the previous article. This time however it contains a couple of more pages. We will not be using the default <Web3Button/> from Wallet Connect. We will create three new routes:
/- The Landing page of our Next App. Open to All and just contains a styled tailwind button that leads to the Login Page./auth- A Custom Login Page in NextJs 13 App where we will connect our wallet and ask the user to sign a message using Web3 Wallet using WalletConnect, SIWE, and Wagmi./hidden- A Protected Route in our app which the user will be redirected to after login. This route will contain the Sign Out logic for the app./api/auth- Authentication Route where Next Auth will work its magic. It will be a backend route where the message will be verified, JWT will be created and sent to the client side.
We will need siwe and next-auth for creating the authentication flow so open a terminal in your project and run npm i siwe next-auth. Next Auth at the time of writing does not provide any connectors for Wagmi or WalletConnnect so we will have to use Credentials Provider and customize that to our flow.
Behind the scenes, Next Auth handles all the JWT logic and session maintenance both on the client and server sides. On the Client side, we can use useSession() hook of Next Auth imported from next-auth/react. While on the server side, we can use the getSession() action from the same import. These return the data object which is conveniently renamed to session. It is this session object that contains a property called user where all the user details reside. We will need this to contain the user’s wallet address and signature.
What is SIWE?

SIWE stands for “Sign-In With Ethereum”. It is basically an RFC (think of it as a rule) which specifies how should authentication take place off-chain eg. Web Apps and Mobile Apps. I would say it’s a long time coming considering how scattered things feel sometimes when you are developing a frontend for a Dapp.
SIWE specifies that a message must have domain and origin along with details like the chain on which the message is meant to be used. This, I would say, helps make things easy. We can avoid a lot of discussion on how to format a message to be signed or concerns about interoperability.
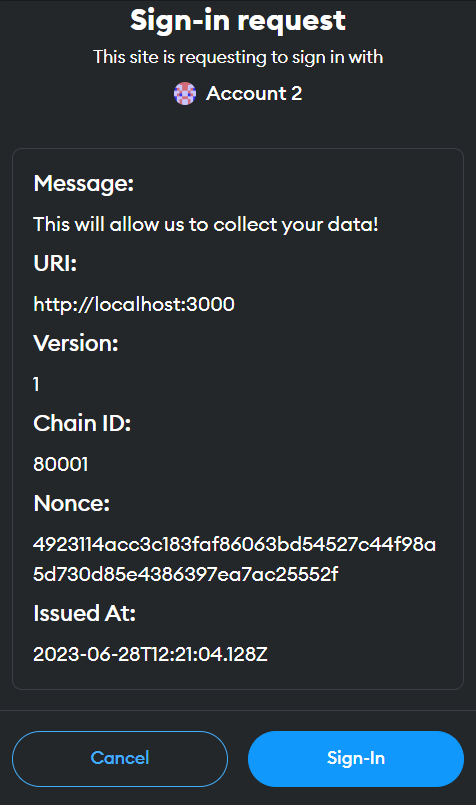
A typical SIWE Signing Request looks like this:
At the moment, SIWE can be used in Typescript, Rust, Elixir, Python, Go, and Ruby. So, one can say they are targeting Web app-intensive languages. The code for Typescript SDK is open-sourced here: %[https://github.com/spruceid/siwe]
Currently, the documentation for usage of SIWE with Next JS is not up to date with Next 13 and so this article aims to help on that front as well.
Components and Pages
So as an upgrade from the previous article, we need to include a few more pages in our Next app.
Home Page
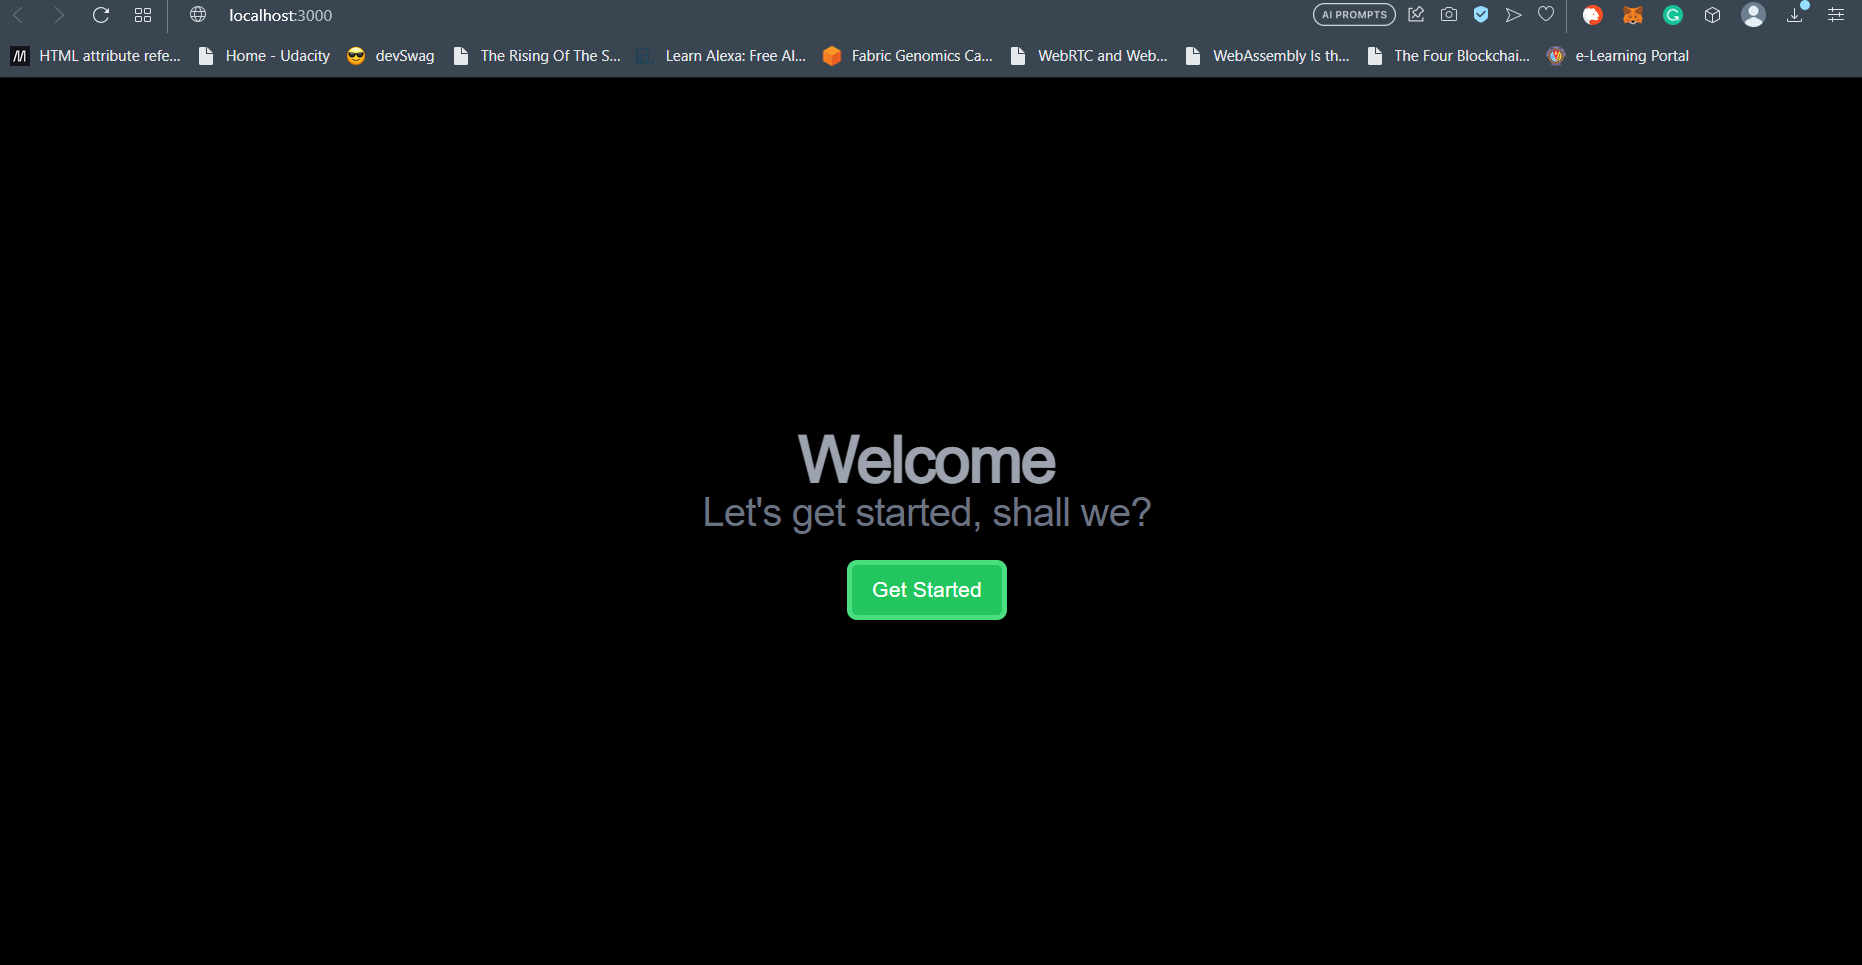
The home page of our NextJs 13 Web3 site will be created inside the root page.tsx file inside the app directory. The following is the code for the component. Explanations follow.
import Link from "next/link";
import React from "react";

export default function Home() {
  return (
    <main className="flex min-h-screen flex-col items-center justify-center">
      <h1 className="text-5xl font-bold tracking-tight text-gray-400">
        Welcome
      </h1>
      <h2 className="text-3xl tracking-tight text-gray-500">
        Let's get started, shall we?
      </h2>
      <Link href="/auth">
        <button className="bg-green-500 border-4 border-green-400 hover:border-green-800 hover:bg-transparent mt-5 rounded-lg py-2 px-4">Get Started</button>
      </Link>
    </main>
  );
}
Firstly, note that unlike the previous article, the home page has been converted to a server component by removal of the ”use client” tag. It doesn’t really matter what you call this component. As long as its the default import, it gets rendered at the route. This is true for all routes and page.tsx files in NextJS 13.
In our case, it is a simple component styled with Tailwind CSS and contains a button that links to the /auth page route. Notice the <Link /> component which wraps the <button />. In NextJS 13, the link component is not imported from next/navigation. It is imported from next/link.
I am not the best UI designer so that’s about it when it comes to the design and the page as a whole. The Home page is open to all.
Authentication Page
Next, create a directory called auth inside the app directory and put a page.tsx file inside it. Notice how we continue on the convention of directory naming in NextJS 13 from our previous article. The absence of the underscore prefix and the presence of page.tsx in the auth directory tells NextJS 13 it’s a frontend route. The Code for the authentication is as follows. Explanations follow.
"use client";
import React from "react";
import { SiweMessage } from "siwe";
import { polygonMumbai } from "viem/chains";
import { useAccount, useSignMessage } from "wagmi";
import { useWeb3Modal } from "@web3modal/react";
import { getCsrfToken, signIn } from "next-auth/react";
const AuthPage = () => {
const [mounted, setMounted] = React.useState(false);
const { address, isConnected } = useAccount();
const { open } = useWeb3Modal();
const { signMessageAsync } = useSignMessage();
const [hasSigned, setHasSigned] = React.useState(false);
React.useEffect(() => setMounted(true), []);
if(!mounted) return <></>
const handleSign = async () => {
if (!isConnected) open();
try {
const message = new SiweMessage({
domain: window.location.host,
uri: window.location.origin,
version: "1",
address: address,
statement: process.env.NEXT_PUBLIC_SIGNIN_MESSAGE,
nonce: await getCsrfToken(),
chainId: polygonMumbai.id,
});
const signedMessage = await signMessageAsync({
message: message.prepareMessage(),
});
setHasSigned(true);
const response = await signIn("web3", {
message: JSON.stringify(message),
signedMessage,
redirect: true,
callbackUrl: '/hidden'
});
if (response?.error) {
console.log("Error occured:", response.error);
}
} catch (error) {
console.log("Error Occured", error);
}
};
return (
<main className="flex min-h-screen flex-col items-center justify-center">
{!isConnected && (
<>
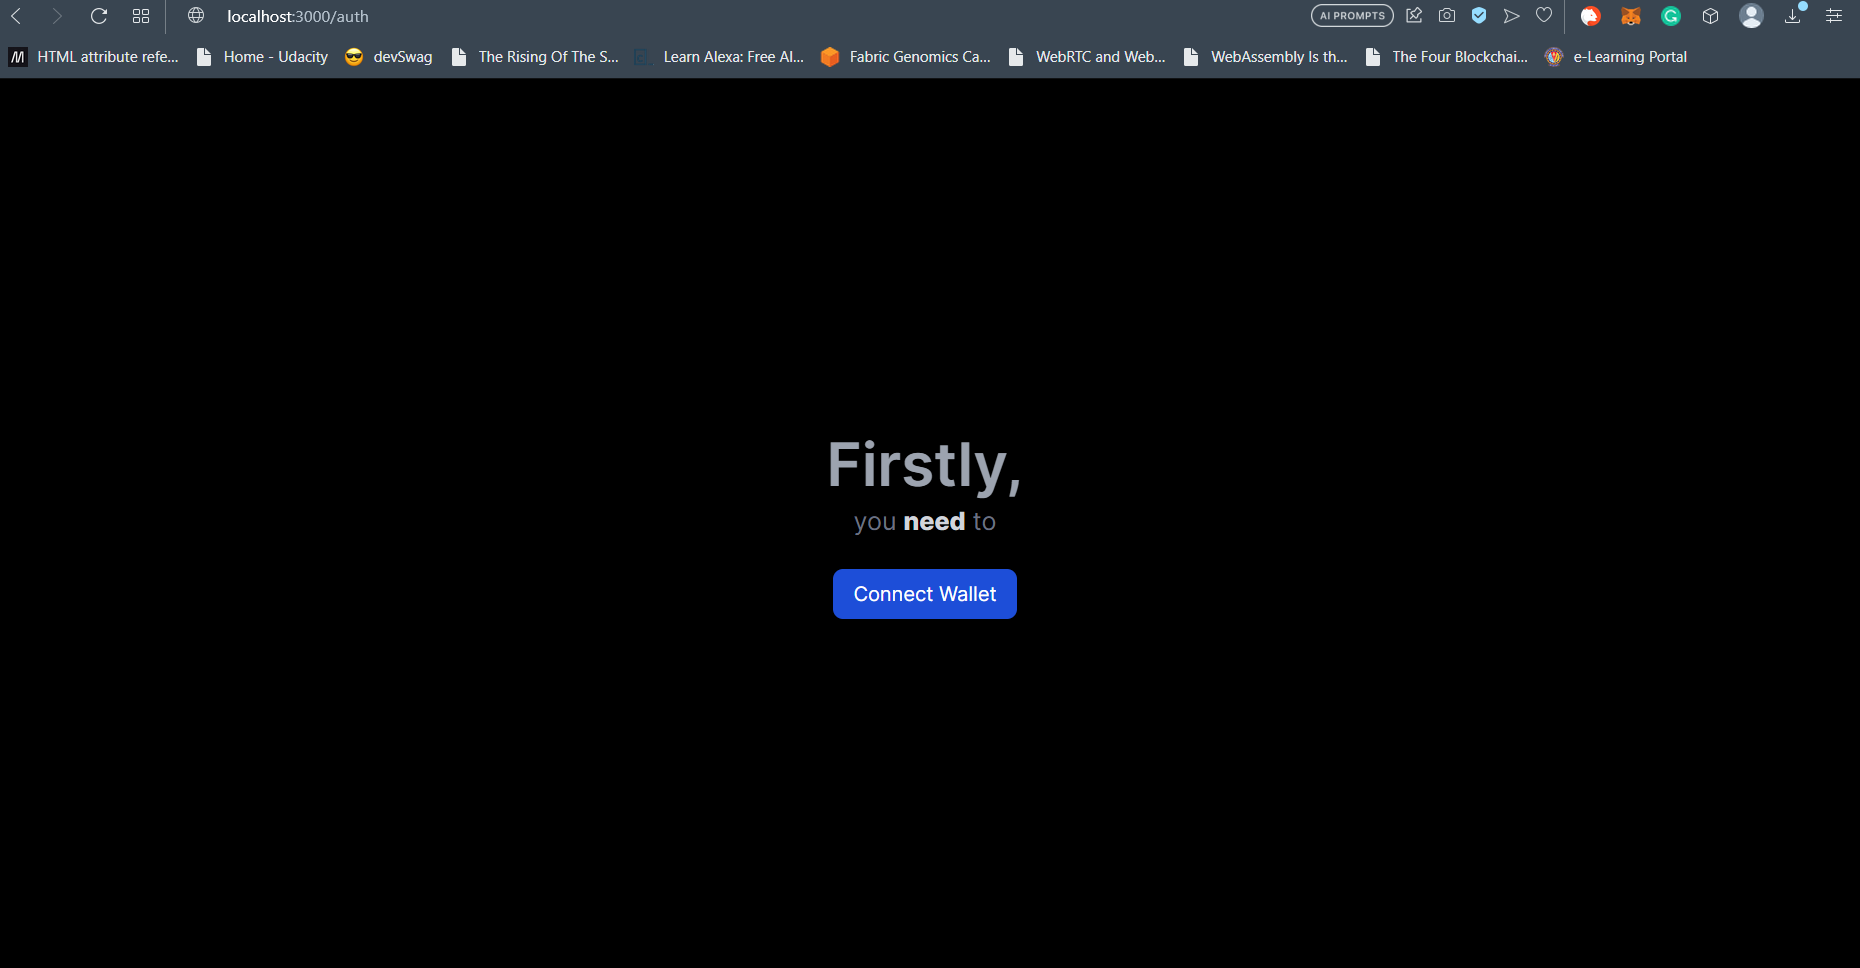
<h2 className="text-5xl font-semibold text-gray-400">Firstly,</h2>
<p className="text-xl text-gray-500 mt-2 mb-6">you <span className="font-extrabold text-gray-300">need</span> to</p>
<button
className="rounded-lg py-2 px-4 bg-blue-700 hover:border hover:border-blue-700 hover:bg-transparent"
onClick={() => open()}
>
Connect Wallet
</button>
</>
)}
{isConnected && !hasSigned && (
<>
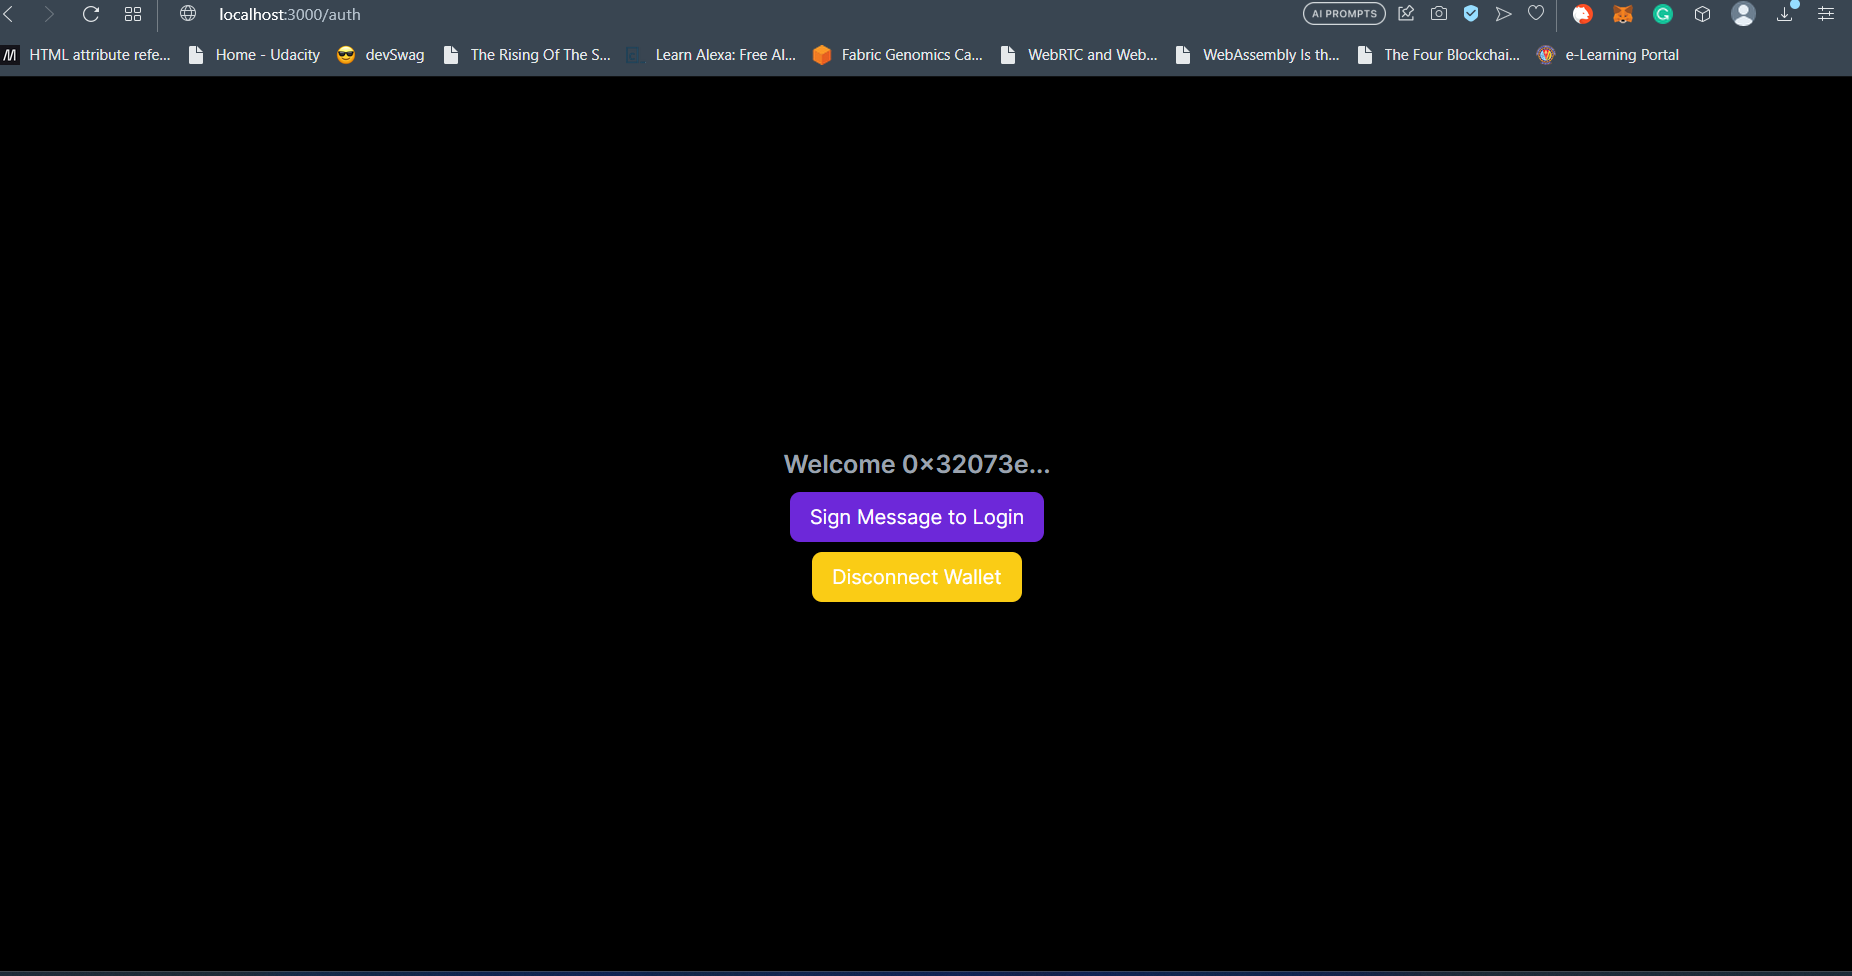
<p className="text-xl font-semibold text-gray-400">
Welcome {address?.slice(0, 8)}...
</p>
<button
className="rounded-lg py-2 px-4 mt-2 bg-violet-700 hover:border hover:border-violet-700 hover:bg-transparent"
onClick={handleSign}
>
Sign Message to Login
</button>
<button
className="rounded-lg py-2 px-4 mt-2 bg-yellow-400 hover:border hover:border-orange-700 hover:bg-transparent"
onClick={() => open()}
>
Disconnect Wallet
</button>
</>
)}
{isConnected && hasSigned && (
<p>You are being authenticated. Please wait...</p>
)}
</main>
);
};
export default AuthPage;
Notice that it is a client-side component. Inside the <AuthPage /> component, we have a state variable called mounted. The idea is this state variable is used to track if the component is being rendered client side or server side. Confusing, right? The thing is there will be a hydration error in our page when it is rendered on the client side. NextJS 13 needs to send a skeletal DOM of the page and because we are checking only on the client side purely if the user has connected the wallet first and then asking the user to sign a message, the server-side rendered component in DOM will differ from the client side one and you will get a Hydration Error in NextJS.
To avoid the Hydration Error in NextJS 13, we use the mounted state variable and set it to true first thing in the component using the useEffect hook. Immediately following that we check if the component is mounted on the client side otherwise, we send empty React Fragments. This solves the problem.
We utilize the useAccount() hook from wagmi to check if the user has already connected (with the isConnected value). If the user has not connected the wallet, then we display the user the Connect Wallet button at line 59 and on that button, we attach an onClick handler for the open function from useWeb3Modal() hook imported at line 12 from the @web3modal/react library of Wallet Connect.
Now If the user has connected the wallet but has not signed our message, the hasSigned React state variable initialized as false helps us display the Sign Message button at line 72. The button has handleSign() as the onClick handler. That’s where the main magic happens.
When the user clicks on the Singing button at line 72, handleSign() at line 19 is invoked. As a precaution, we check if the user is still connected to the wallet and if not open the WalletConnect Web3 Modal for connection. After that, create a new message to sign using new SiweMessage(). We specify the domain and origin as window.location.host and window.location.origin respectively while the version is specified as “1”. No brainer there.

After that, the address is the wallet address with which the user is connected. The statement property is where you specify the message to be signed. I like to place that message as a public env variable so that it is accessible on the client and server side. That helps during verification. Now we could have used a custom nonce but the CSRF token serves that purpose. We fetch the CSRF token using the getCsrfToken() function from next-auth/react. chainId in our is the Polygon Mumbai Testnet Chain ID since that’s where our smart contract is deployed.
This creates a message to be signed. The signMessage() function from the useSignMessage() hook (wagmi import) helps us sign the message at line 32. Using the prepareMessage() function helps us generate a nice-to-look Message with all the params we have specified during Message Generation. It shows those at the wallet signing prompt.
This message is then stringified and sent through the signIn() method from next-auth/react to Next Auth’s authentication routes which we will create in the later section. We say that we want to redirect to the route /hidden on successful authentication. Next Auth takes care of that. This is specified using the redirect and callbackUrl values. If you do not want to redirect to any route, you can set redirect as false in this case, after successful authentication, you will still stay on the /auth route on this same page.
If the authentication is successful, Next Auth’s signIn() response will contain an ok value set to true. If response.ok is returned as false then that means there was an error on the server. You can access the error using response.error. In our case, we just redirect using Next Auth to a protected route on successful authentication or log the error on the browser console.
Using Next Auth, we can have more than one authentication method in our Next 13 app. We can have Google Authentication, GitHub authentication, or even our custom authentication method (which we use in our case) among other methods. These are made available through “Providers” and you can read more about them here.
Hidden Page
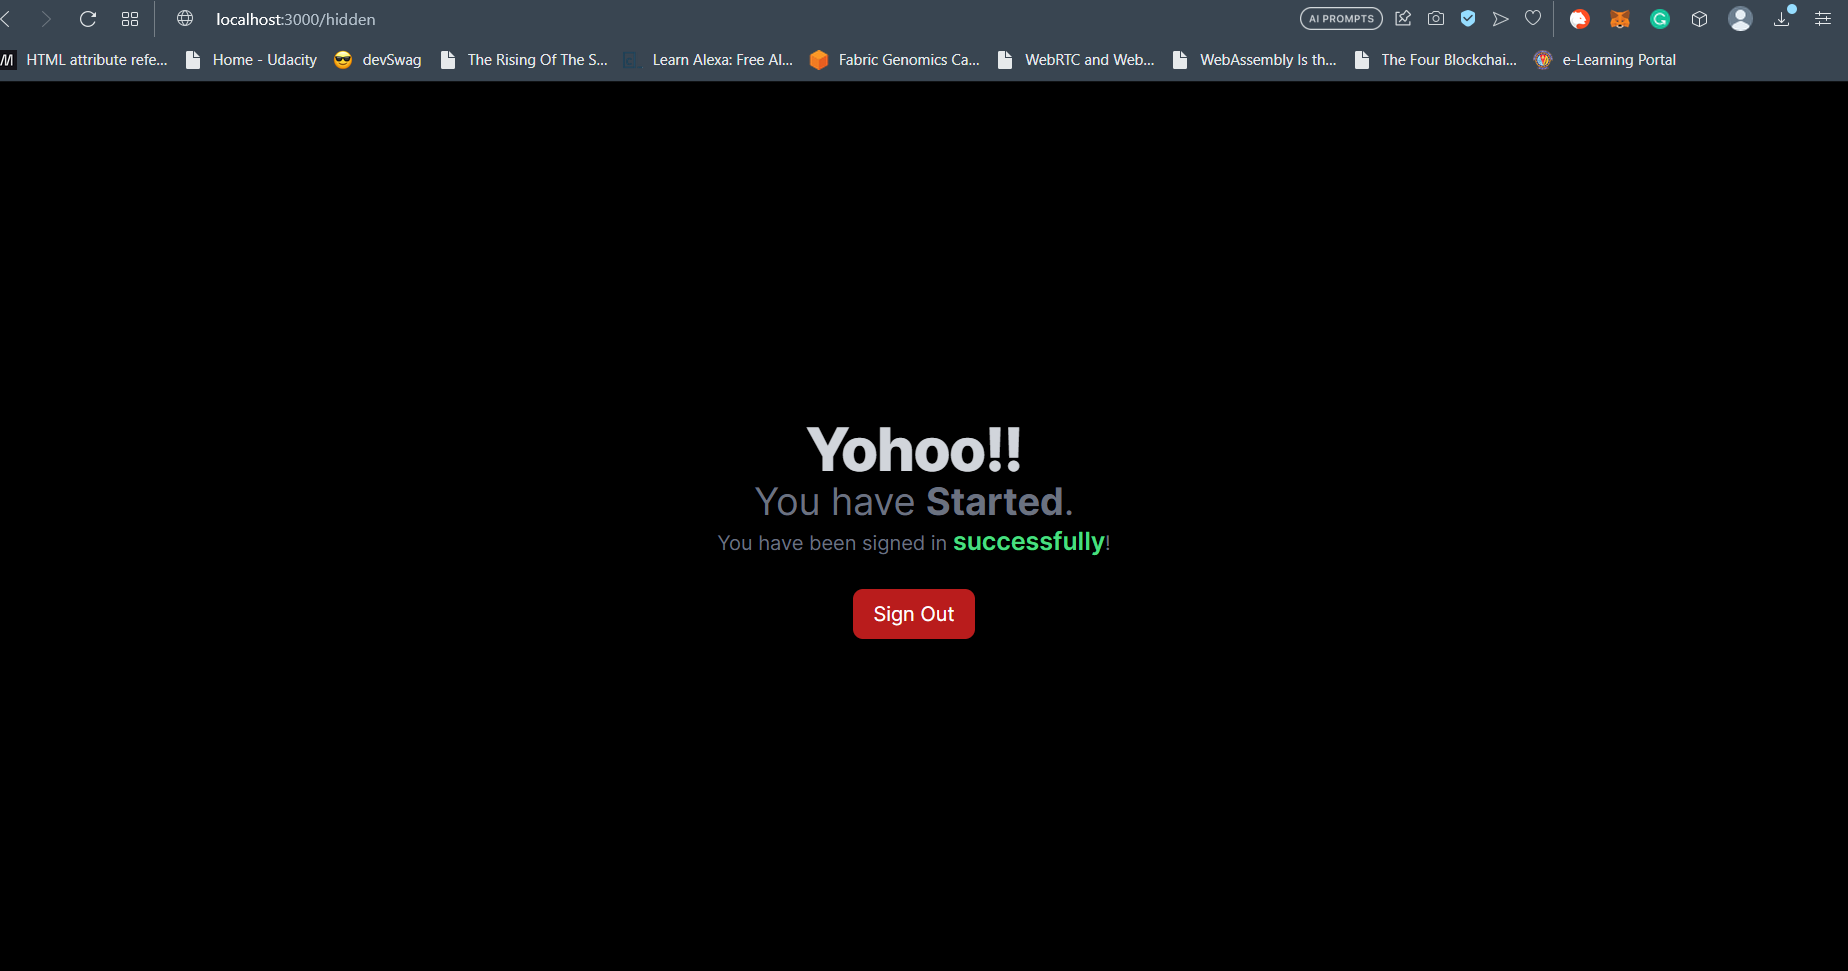
This is a protected page and will only be accessible if the user has successfully logged in. This page will be available at the /hidden client route. So, make a folder called hidden inside app directory and then create a page.tsx inside it. Code and explanations follow.
"use client";
import { signOut } from "next-auth/react";
import React from "react";
import { useDisconnect } from "wagmi";

const HiddenPage = () => {
  const { disconnectAsync } = useDisconnect();
  const handleSignout = async () => {
    disconnectAsync();
    signOut({callbackUrl:"/"});
  };
  return (
    <div className="flex min-h-screen flex-col items-center justify-center">
      {" "}
      <h1 className="text-5xl tracking-tight font-extrabold text-gray-300">
        Yohoo!!
      </h1>
      <h2 className="text-3xl text-gray-500">
        You have <span className="font-bold">Started</span>.
      </h2>
      <p className="text-gray-500">
        You have been signed in{" "}
        <span className="font-semibold text-green-400 text-xl">
          successfully
        </span>
        !
      </p>
      <button
        className="rounded-lg py-2 px-4 mt-6 bg-red-700 hover:border hover:border-red-700 hover:bg-transparent"
        onClick={handleSignout}
      >
        Sign Out
      </button>
    </div>
  );
};

export default HiddenPage;
This is another client page as you can see above. This page mainly is used for Logging out. The “Sign Out” button has a click handler where we disconnect from the wallet connection at line 9 and then use the signOut() function to tell Next Auth to destroy the user session (effectively logging out) and then redirect to the Home page using the callbackUrl value.
That’s about it really about the pages, next we will get into the Next Auth-related changes and that’s where the tricky parts come in.
Next Auth Integration
There is a reason why Next Auth is often the de facto auth library used with Next JS. It offers a ton of options for authentication and makes session management quite easy. But to use it inside any Next App, we need to follow a certain list of steps first. This section discusses those steps in detail.
How to use Next Auth’s AuthContext in Next 13?
In the previous article, we discussed that we can include any Context we want as a client component and wrap the children inside the layout.tsx file. We even created a <Providers /> component which was our kind of Barrel Export. So, inside our _providers directory, create a file called AuthContext.tsx. Inside this file, we create the following client-side component:
"use client";

import { SessionProvider } from "next-auth/react";

export interface AuthContextProps {
  children: React.ReactNode;
}

export default function AuthContext({ children }: AuthContextProps) {
  return <SessionProvider>{children}</SessionProvider>;
}
We wrap the {children} props with the <SessionProvider /> component from Next Auth’s next-auth/react. This <AuthContext/> component can now be used inside of our <Providers/> component inside providers.tsx file like shown below and we will not have to touch layout.tsx file.
"use client";
import React from "react";
import WagmiProvider from "./WagmiProvider";
import AuthContext from "./AuthContext";

type ProviderType = {
  children: React.ReactNode;
};

const Providers = ({ children }: ProviderType) => {
  return (
    <WagmiProvider>
      <AuthContext>{children}</AuthContext>
    </WagmiProvider>
  );
};

export default Providers;
This completes our first step.
Defining Server Route for Next Auth.
Next Auth by default functions on the /api/auth server route if used server side. We won’t change that. So, create a folder called api inside app directory and then another nested folder called auth inside api. Inside auth directory, create a directory named […nextauth]. Notice the weird name. That’s essential for Next Auth to work correctly. Inside the […nextauth] directory create a route.ts. There won’t be a .tsx suffix. This is a server route and not a component.
In the next 80-ish Lines of code pasted below, we will tell Next Auth to use the CredentialsProvider for signing in users using a custom method. Paste the code below inside the route.ts file. Explanations follow.
import { AuthOptions } from "next-auth";
import NextAuth from "next-auth/next";
import CredentialsProvider from "next-auth/providers/credentials";
import { getCsrfToken } from "next-auth/react";
import { SiweMessage } from "siwe";

export const authOptions: AuthOptions = {
  providers: [
    CredentialsProvider({
      id: "web3",
      name: "web3",
      credentials: {
        message: { label: "Message", type: "text" },
        signedMessage: { label: "Signed Message", type: "text" }, // aka signature
      },
      async authorize(credentials, req) {
        if (!credentials?.signedMessage || !credentials?.message) {
          return null;
        }

        try {
          // On the Client side, the SiweMessage()
          // will be constructed like this:
          //
          // const siwe = new SiweMessage({
          //   address: address,
          //   statement: process.env.NEXT_PUBLIC_SIGNIN_MESSAGE,
          //   nonce: await getCsrfToken(),
          //   expirationTime: new Date(Date.now() + 2*60*60*1000).toString(),
          //   chainId: chain?.id
          // });

          const siwe = new SiweMessage(JSON.parse(credentials?.message));
          const result = await siwe.verify({
            signature: credentials.signedMessage,
            nonce: await getCsrfToken({ req }),
          });

          if (!result.success) throw new Error("Invalid Signature");

          if (result.data.statement !== process.env.NEXT_PUBLIC_SIGNIN_MESSAGE)
            throw new Error("Statement Mismatch");

          // if (new Date(result.data.expirationTime as string) < new Date())
          //   throw new Error("Signature Already expired");
          console.log("Returning")
          return {
            id: siwe.address,
          };
        } catch (error) {
          console.log(error);
          return null;
        }
      },
    }),
  ],
  session: { strategy: "jwt" },

  debug: process.env.NODE_ENV === "development",

  secret: process.env.NEXTAUTH_SECRET,

  callbacks: {
    async session({ session, token }: { session: any; token: any }) {
      session.user.address = token.sub;
      session.user.token = token;
      return session;
    },
  },
  pages: {
    signIn:"/auth"
  },
};

const handler = NextAuth(authOptions);

export { handler as GET, handler as POST };
In the above code we create our custom Next Auth handler called handler (shocker there 😊 ). The handler is created using NextAuth by specifying the authentication options and then the handler is mapped to GET and POST routes in the last line. This means the Next Auth handler will respond to GET and POST requests on the /api/auth route.
How to create Next Auth authOptions?
The authOptions declaration starting at line 7 contains, firstly, a list of providers through the array passed into providers. This is where you can specify Github, Google, Facebook and other providers for sign-in. The sign in developer experience is seamlessly handled by Next Auth with those providers.
In our case, we specify a CredentialsProvider. This is used for custom sign-in methodologies. The id and name are important values. Imagine in your Next App you have 2 custom sign-in options –
Using Wallet Sign In
Using Username and Password Sign In
That’s when you will use two different CredentialsProvider with different names and pass them to the providers array. In such a case, from the frontend, you will specify the ID of the CredentialsProvider to the signIn() method from next-auth/react along with the required credentials for that type of sign-in.
Next Auth Modification for Web3
Thankfully, in our case, we need only one. We provide the types and names of the credentials on line 12. Following this, we have the authorize() function where the main logic is implemented. In a Web2-esque sign-in, this is where you will fetch the values like username, email, and hashed password from the DB and compare the user. If this function returns null then Next Auth assumes authentication failure and reverts with an error.
As iterated before, we do not need any DB. In our case, we will just verify if the message and signedMessage (or signature, whatever you want to call it) match our expectations or not. We recover the SIWE message sent to the handler from the frontend in a stringified manner. In line 34, invoking the verify() method on the reconstructed message by passing in the signature or in our case the value of the cred signedMessage along with the nonce will help us in verifying the message authenticity.
The Nonce value here can be obtained by again calling in the getCsrfToken() method. But this time, we need to pass in the req object to the method to record the CSRF token from the Request sent to the Next Auth handler.
If result.success from this operation is true then we can say that the signature is for the same SIWE message. But keep in mind we cannot say that the messages signed were the same. For this, we need an additional check at line 41 checking the value of our Logging Message (stored as an env variable) with the message inside the SIWE message object reconstructed from the request.
If these checks pass, then we can be assured of an authentic Sign In request and we return the Wallet Address of the signer with siwe.address at line 47.
Modifying Session Management, Secrets & Pages in Next Auth
Next, we need to tell Next Auth that with this credential’s provider, Next Auth is supposed to use the jwt strategy. This means the access token is maintained on the client side and not on the server side. That’s what we do at line 57.
You might be aware that for using JWT we need secrets. That’s what we specify at line 61. We store our secret in our .env file. The methods in callbacks are called when creating, using, destroying JWT tokens, or manipulating the Session in any way.
By default, the session object is made available through the useSession() hook on the client side containing a user object with name, email, and image properties. Those are not valid for us. We need the user object to contain the wallet address of the user. In our case, the subject of the JWT token (token.sub) will contain that value. So we need to modify the session object of Next Auth. You might also need the user object to contain the token itself in your use case. Both of these are accomplished through lines 65 and 66 respectively.
At line 71, under pages we tell Next Auth to use the ‘/auth` route for Sign In requests. So, it knows that any requests coming from that route are for Signing In. With this, our work is almost done.
Protecting Routes in Next JS using Next Auth
Two Lines - that's all it takes. To protect routes in Next JS using Next Auth, we need to create a middleware.ts file in the root of our project. Inside this file, we need to tell Next Auth which routes in our app are protected. Next Auth will make sure that only authenticated users can access these. This can be done by placing the following code inside the above-mentioned file.
export { default } from "next-auth/middleware"
export const config = { matcher: ["/hidden"] }
You can specify route patterns inside the matcher array using regex. Next Auth will make sure that if any unauthenticated requests are placed to these routes, then the user goes through the sign-in page. In our case, we have previously told Next Auth that the sign-in page in our app is at /auth route inside the route.ts above. So, Next Auth will redirect users to that page.
Our Next App till now
At this stage, we have a full authentication flow in our app. A user can start from the landing page and then sign in using their wallet. This will redirect them to a protected page. This completes our app up to the 60% mark. We still have major work to do where our app will be able to interact with a smart contract.
Conclusion
This was one long article. I honestly didn’t think it would be this big.

Another reason it's funny for me is that I discussed in the previous article that this would be a two-part series and now it has become a three-part series. So now I feel like I am making a Fast and Furious franchise-like series.

Until the next article, keep building awesome things on Web3 and WAGMI!


